Showing posts with label christmas. Show all posts

Friday, December 20, 2013

5 days until Christmas


Today I'm sharing a couple more Christmas cards that I made this year. As you can see, I'm really enjoying the sequin trend. Thanks so much for stopping. Happy Stamping!

Tuesday, December 17, 2013

Merry Christmas


I just love the Christmas Words Dies from Paper Smooches. I used the Merry Christmas words for this card paired with one of the adorable snowmen from the Swanky Snowdudes set.

Are you ready for Christmas? I still have some shopping to do but at least my cards are done. Thanks for stopping by. Happy Stamping!

Monday, December 16, 2013

8 days until Christmas

Today I have a couple more Christmas cards to share with you. It's hard to believe there are only eight more days until Christmas.


For these cards I heat embossed the tree from Papertrey Ink and colored it with Copics. I also heat embossed the sentiment and then added some twine and sequins to finish them off.

Thanks so much for stopping. Hope you're having a magical Monday. Happy Stamping!

Friday, December 13, 2013

Happy Friday the 13th

One of the Christmas cards I sent out this year.

Wednesday, December 4, 2013

21 Days 'til Christmas


This card features stamps from Papertrey Ink and papers from Prima. I also added a couple of pom poms to the skates and heat embossed the skate blades with silver embossing powder.

Thanks so much for stopping. I hope you're having a wonderful week.

Tuesday, December 3, 2013

22 Days 'til Christmas


I have two cards to share today. They feature a poinsettia stamp from PSX. The first card has a few pearls on the bottom instead of a greeting and the second card features a greeting from Papertrey Ink.


Thanks so much for stopping by. I hope you'll check back tomorrow for more holiday card designs.

Monday, December 2, 2013

23 Days 'til Christmas


Today's card features a greeting from Memory Box, the adorable snowman from Paper Smooches Swanky Snowdudes set, papers from October Afternoon and a little glass glitter for a snow effect.

Thanks so much for stopping by. I hope you'll check back tomorrow for more holiday card designs.

Sunday, December 1, 2013

24 Days 'til Christmas

I thought it would be fun to do a countdown to Christmas on the blog so I am hoping to post at least one holiday card a day until Christmas.


Today's card features a greeting from Paper Smooches, poinsettia dies from Spellbinders and papers from October Afternoon.

Thanks so much for stopping by. I hope you'll check back tomorrow for more holiday card designs.

Saturday, November 30, 2013

Christmas Tags

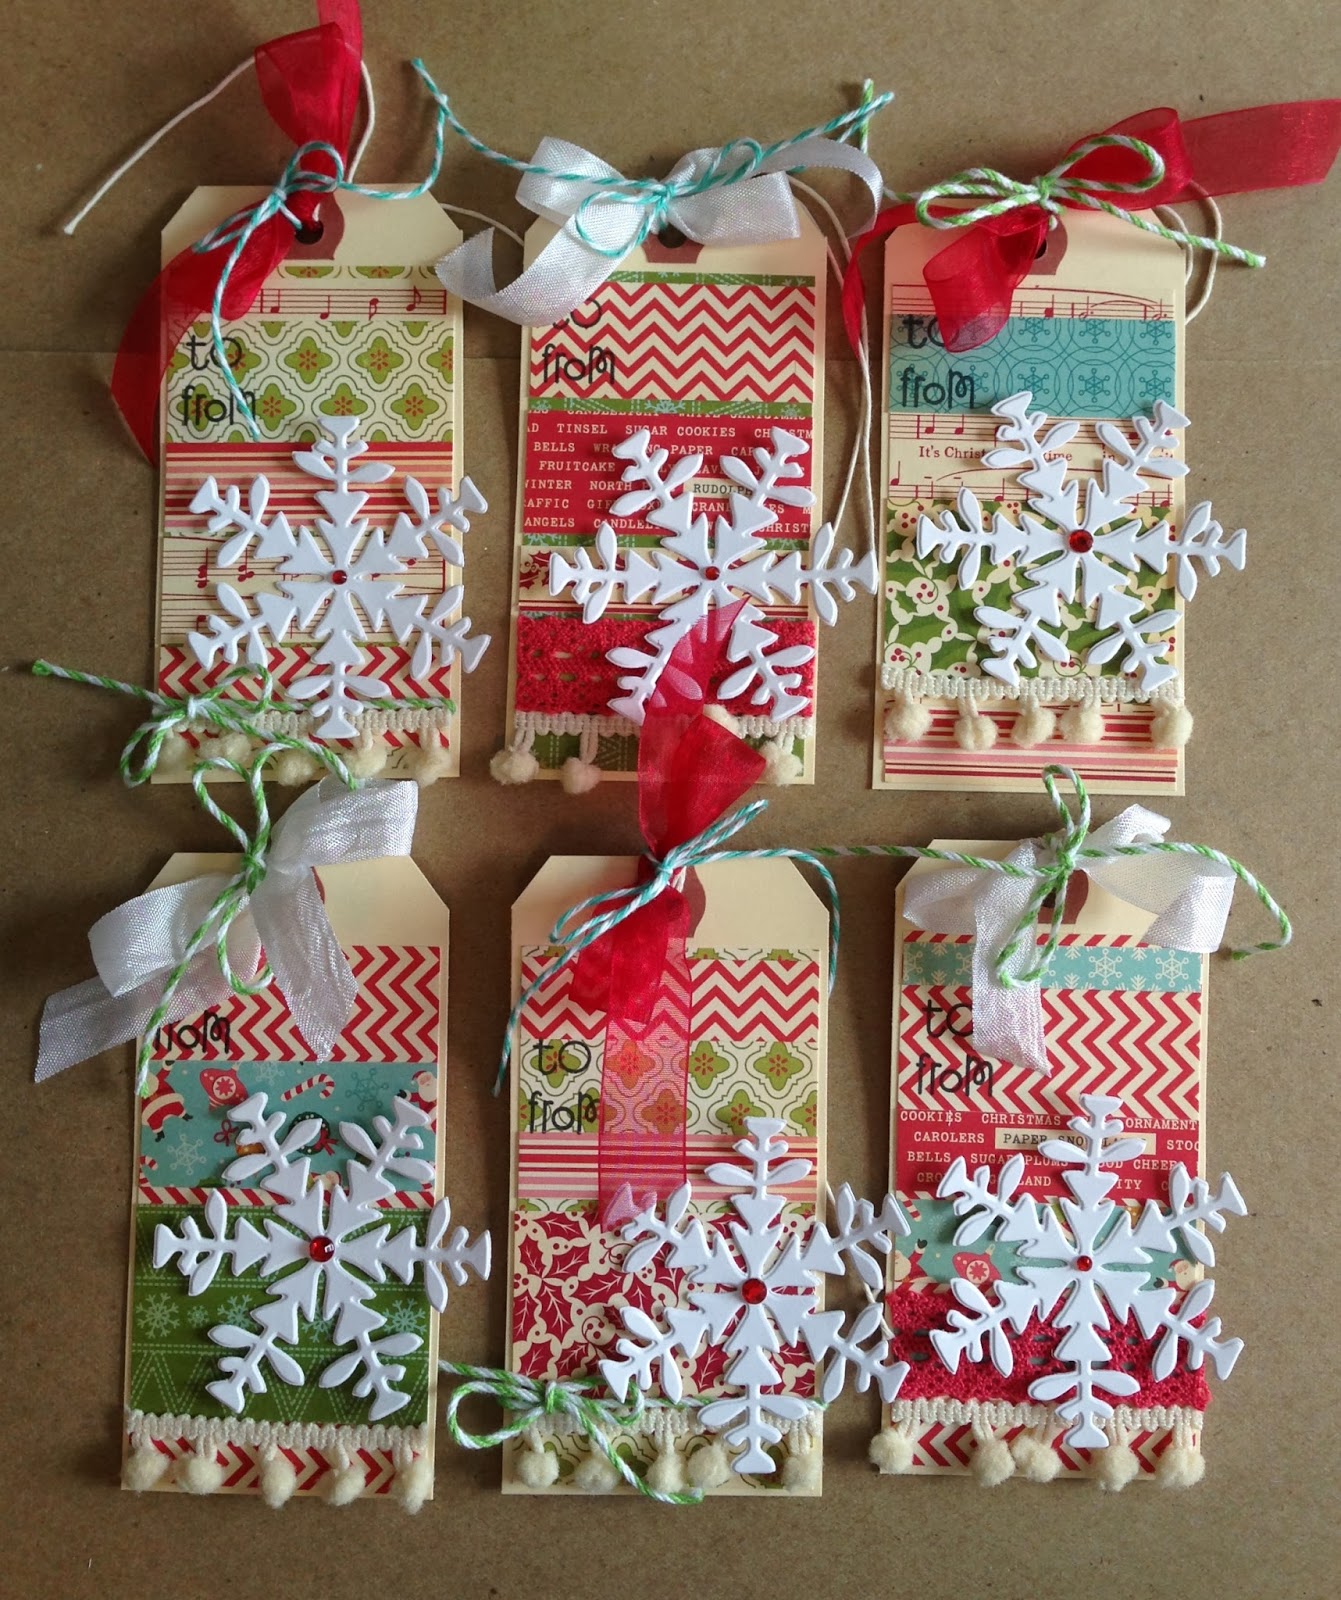
How about dressing up some plain old shipping tags to make some Christmas tags? That's what I have to share with you today... Christmas tags made using a Cuttlebug snowflake die, papers from October Afternoon, stamps from Paper Smooches, twine from The Twinery, and gems, trims and ribbons from local craft stores.

Thanks so much for stopping by. I hope you're having a great day. Happy Stamping!

Wednesday, October 9, 2013

Christmas Words

Paper Smooches recently released a Christmas Words Die that I just had to have. Here's my first card using the new die. I left the die intact and ran it through my Cuttlebug twice in order to cover the card front. I stitched the kraft piece to a rustic white card base and then I used some October Afternoon paper to die cut the Merry Christmas sentiment.

Just a nice simple card but I really like the end results. I hope you're all having a wonderful Wednesday. Thanks for stopping.

Supplies: Paper Smooches Christmas Words Dies; PTI Kraft, Rustic White cardstock; October Afternoon Cakewalk Streamers paper

Sunday, January 1, 2012

Wishing you a Happy New Year

Well, I hope 2012 is off to a good start for all of you. I'd like to start the year off by sharing one last Christmas project and also a couple of New Year's cards.

First is the Christmas tag and bag that I put together for my office assistant. I used a variety of papers from the October Afternoon Good Cheer collection and letter stickers from October Afternoon's Detours collection to spell out Hayden's name on the tag. I also added a die cut/embossed snowflake from Cuttlebug with a button center. For the finishing touch I added a couple of small jingle bells and some twine from The Twinery.
The bag is just a brown paper lunch bag that I added strips of paper to the bottom to dress it up. I used my cropodile to punch a couple of holes in the top of the bag and threaded some twine through the holes to close the bag and tie on the tag.

Next, I have a couple of New Year's cards using the fun Happy New Year set from The Crafts Meow and papers from the Crate Paper Portrait collection. The first card also uses some Tim Holtz tissue tape, twine, gemstone and is mounted on a purple card base.

 The second card uses a little lace and stone colored twine along with a button die cut using the MFT Button dies. I die cut the button from PTI Rustic White cardstock and colored it with a Copic (C7).

Thanks so much for stopping by. Wishing you all a Happy New Year and Happy Stamping!

Tuesday, December 27, 2011

Christmas tags with Unity

Just a quick post to share a couple of Christmas tags I made using Unity stamps for the Unity gift wrapping challenge found here - http://www.theunitystampco-challenge.blogspot.com/2011/12/gift-wrapping-challenge.html


Thanks so much for stopping by. Happy Stamping!
posted from Bloggeroid

Wednesday, November 30, 2011

Season's Greetings


Today's cards feature some Cosmo Cricket Mitten Weather papers, a greeting from Inkadinkado, a die cut from Papertrey Ink, a snowflake die from Cuttlebug and twine from The Twinery. These cards were made with the last of a 12x12 piece of Mitten Weather paper so the layouts are slightly different to accommodate the scraps. Since they're a little different, I thought I would share both.

I embossed the sentiment with SU Gold embossing powder and sponged the edges of the die cut with Vintage Photo distress ink. Before adding the twine, I used my crop-o-dile to add eyelets to the die cut. The snowflakes are die cut from Warm & Natural with button centers.

Thanks so much for stopping. I hope you're all having a wonderful Wednesday. Happy Stamping!

Friday, November 25, 2011

Black Friday

Happy Black Friday! For those of you out shopping today I wish you luck.


I have another Christmas card to share today. This one uses the same stamp set from Inkadinkado as yesterday's card. For this one, I embossed the tree with clear embossing powder on October Afternoon patterned paper and then sponged Walnut stain distress ink over the entire piece to bring out the embossed image. I added some brown trim I picked up at an estate sale recently along with white seam binding and a paper rose made from some vintage sheet music. The die for the rose is from My Favorite Things. I applied B00 Copic to the flower to give it some subtle color and help match it to the patterned paper. The leaves are from the Spellbinders Foliage dies. The scalloped image and sentiment both use the Spellbinders Long Classic Scalloped Rect dies.

Thanks so much for stopping. Happy Shopping to those of you participating in Black Friday!

Thursday, November 24, 2011

Happy Thanksgiving

Wishing all of you celebrating Thanksgiving today a wonderful day with friends and family. Hopefully you're not stressing out about the food and are able to enjoy the day. Unfortunately I don't have a Thanksgiving card to share with you today but I do have a couple of Christmas cards to share.


My daughter recently found this stamp set for $1.99 at TJMaxx and bought it for me. I had to ink it up as soon as she brought it home. I paired it with papers from the Jovial collection from Basic Grey. The 12x12 papers are double sided so by using this simple layout I was able to make 5 cards from one sheet of designer paper plus a matching scrap of My Mind's Eye paper for the circle borders around the sentiment. The snowman stamp and snowflake are from Inkadinkado and the sentiment is from Memory Box. For fun, I added some A Muse Studio glitter to some of the circles around the snowman image.

Thanks so much for stopping. Happy Thanksgiving!

Thursday, November 17, 2011

Oct Afternoon Good Cheer

So have you started on your Christmas cards yet? After attending the October Afternoon warehouse sale last month where I found some 8x8 packs of Good Cheer, I had to come home and get started making Christmas cards. Here's one of the cards I made with the Oct Afternoon papers and a plastic candy cane that I picked up at a tag sale this summer. I finished it off with a button and bow and a sentiment flag. The card won't mail well with the bulk of the candy candy and button so I guess it will have to be hand delivered to someone special.

Thanks so much for stopping. I hope you're having a great day!

Thursday, December 24, 2009

Merry Christmas Eve!

I have a couple more Christmas cards to share with you today. I made this one using the Home set from Artistic Outpost. The image is stamped in Fired Brick and the edges were sponged with Vintage Photo. For the greeting I used Walnut Stain. I tried to make the barn look like it was covered in a blanket of snow by adding some Diamond Dust. For the finishing touch I wrapped some Ecru floss around the card and added a button and some punched branches.


The second card is a 4 1/4 inch square card with no dimensionals because I wanted to make something that would go through the mail easily and not cost extra postage. I will just use a regular invitation size envelope.


I'm glad that I did my grocery shopping last night before the blizzard hit. We don't have too much snow on the ground yet but they're forecasting snow all day today and 6-8 more inches tomorrow with really high winds so at least I don't have to worry about getting to the store.

Merry Christmas everyone and I hope you all have safe travels! Thanks so much for stopping.


Supplies (top card):
  • Stamps: Artistic Outpost
  • Paper: Kraft, Vanilla, Creative Imaginations Winter Woodland
  • Ink: Distress Inks Fired brick, Vintage photo, Walnut stain
  • Misc: Edge distresser, Embroidery floss, Button, Martha Stewart branch punch, Diamond dust

Supplies (second card):
  • Stamps: SU Bud Basics, Papertrey Ink sentiment
  • Paper: Vanilla, Rich Razzleberry, Creative Imaginations Winter Woodland
  • Ink: Rich Razzleberry, Soft Suede, Distress Ink Vintage photo
  • Misc: Circle punch, Paper piercer, Twinklette clear

Tuesday, December 22, 2009

Paper Stockings

All of the older nieces and nephews get money for Christmas so each year I try to come up with a way to package the money other than just putting it in a card. This year I tried making paper stockings. I cut out two stocking shapes, sewed them together and then added a faux fur top. The create the faux fur top I cut white cardstock to 2 x 4, ran it through my cuttlebug with an embossing folder, rounded the corners and then attached it to the stocking with scor-tape.


For my assistant I went with an iTunes card and a chocolate Santa. To accommodate them I had to make the stocking a little wider.

These went together pretty quickly which is great because I still have 8 more to make. Happy Holidays!

Wednesday, December 16, 2009

Holiday Thank you cards

Last night I made a set of 12 holiday thank you cards for a friend. The Be Merry paper collection from My Mind's Eye was perfect for this project. I punched 2 inch circles from 4 of the different papers and adhered them across the bottom of the cards. Next I cut out trees from another sheet in the collection and mounted them to the cards with pop dots. Finally I stamped thank you in Memento Rich Cocoa just above the circles.

I'm really happy with the way they turned out. I hope my friend likes them. Now if I could just get motivated to finish my Christmas cards and get them in the mail. Maybe I should just start making New Year's cards and send those out instead. Happy Stamping!


Supplies:
  • Cardstock: Stampin Up Very Vanilla
  • Designer Paper: My Mind's Eye Be Merry
  • Stamps: Clear Dollar Stamps
  • Ink: Memento Rich Cocoa
  • Misc: 2 inch circle punch, pop dots

Wednesday, November 18, 2009

Reindeer Noses

Are you looking for a cute little stocking stuffer or small gift for the kids in the neighborhood or classmates? Well, how about some Reindeer Noses.


A friend brought me a page torn out of her Current Catalog and asked me if I could make her some packets of Rudolf Noses. After more thought and discussion we decided on Reindeer noses instead of strickly Rudolf noses. Here's what I came up with. . .

8 whoppers per pack for Dasher, Dancer, Prancer, Vixen, Comet, Cupid, Donner and Blitzen. And 1 cherry sour for Rudolf.


Thanks so much for stopping. I hope you're having a wonderful Wednesday! Please let me know if you make any packets of noses and leave me a link if you post them on-line.
Happy Stamping!

Supplies:
  • Stamps: Hero Arts (frame and reindeer), Snap Stamps (words)
  • Paper: Kraft, Vanilla, Riding Hood Red
  • Ink: Kiwi Kiss, Riding Hood Red, Cocoa
  • Misc: Lollipop bags, Candy, Crystals