Friday, June 27, 2008

Serenity

I love this stamp! It's from the Serenity set by Artistic Outpost. I used the distress ink technique that I showed on this post to make the background and then stamped the image with Tim Holtz Walnut Stain Distress Ink. The card base is SU marigold morning with Tea Dye Distress Ink sponged on the edges. The layer is stamped with a Hero Arts stamp inked in Brushed Corduroy Distress Ink and then also sponged with Tea Dye Distress Ink. I added the white gel pen to the house to make it stand out a little. Then I painted a grungeboard swirl with a peeled paint dabber and added a prima flower and dew drop for the finishing touches.

Thanks so much for stopping. I hope you have a wonderful weekend.

Thursday, June 26, 2008

Time for a Girls Getaway!


I made this little coaster box to hold supplies for a Girls Getaway. I covered both sides of 5 coasters with the Marcella K Summer Travel papers and then used my crop-o-dile to punch holes in four of them and thread them together with ribbon to make the box. The Jet-Setter Darling from Clear and Simple Stamps is stamped in Palette Hybrid Noir on white cardstock and colored with Copics. I cut her out and mounted her with pop dots. Inside the box is some body wash, lipgloss, nail polish and an emery board. My bookclub is having an overnight meeting at one of the members cabins next month and I though it would be fun to make these and bring them along. I think I'll tuck some chocolate in them too.

Here's another view

The weather is finally great here in Minnesota. It's sunny and in the 80's. . . perfect! I hope you're enjoying your day. And as always, thanks for stopping by.

Monday, June 16, 2008

More Jet Setter Darling

Here are some more samples I made using the Jet-Setter Darling set from Clear and Simple Stamps. For the first card I used the Marcella K Summer Travel papers plus a matching tag. I love how these papers go with this stamp set. She looks totally ready for a vacation somewhere nice and warm where she can just hang out on the beach or next to the pool reading the book she has tucked in her big bag.

Supplies:
  • Stamps: Jet-Setter Darling from Clear and Simple Stamps
  • Papers: White cardstock, Marcella K Summer traveler pack and matching tags
  • Ink: Palette hybrid noir
  • Accessories: Copic markers
I used the same paper pack for the second card but used SU soft sky for the card base and layers. Her bag is paper pieced to match the Girl's Getaway panel. I added the scalloped circle and patterned smaller circle under the bottom corner of the image and placed a prima flower in the corner. I added some microbeads and glitter to the flower center using crystal accents.

Supplies:
  • Stamps: Jet-Setter Darling from Clear and Simple Stamps
  • Papers: SU Soft Sky, Marcella K Summer traveler pack
  • Ink: Palette hybrid noir
  • Accessories: Copic markers, Prima flower, Microbeads, Glitter, Nestabilities, Marvy circle punch
As always, thanks for stopping. I hope you're all having a great day!

Sunday, June 15, 2008

Happy Father's Day

Just a quick post to wish everyone a Happy Father's Day and share the card I made.


Supplies

  • Cardstock - Paper Source Moss and Chocolate, Basic Grey Archaic
  • Ink - Distress Ink Walnut Stain
  • Stamp - Eureka! Stamps, retired SU greeting
  • Misc -Tim Holtz Fragments, crystals effects, blue hemp

Saturday, June 14, 2008

Distress Inks Tag Tutorial Part 2

Today I will show you the second half of the tutorial - how to create your own ink pad with distress inks, heat embossing with distress inks, and creating your own shimmer mist with re-inkers and radiant pearls.

Let's start with the list of supplies needed to create our own ink pads Cut out a square of the Cut and Dry felt pad large enough for your image. Stamp the image with archival ink onto the felt side for a pattern of where to put your ink colors.

Apply inks to the pad. You need to work rather quickly because the inks will spread. I started with peeled paint in the center of my leaf and brushed corduroy for the stem plus spiced marmalade for aged mahogany for the tips of the leaf.

Here's what the pad looks like once it's all inked. I stamped it a couple of times on plain white cardstock for a sample. I store my handmade ink pads in an empty Sizzix plastic case. I write the names of the colors used on a piece of masking tape and attach it to the bottom so when I need to reink it I know what colors is it.

Distress inks stay wet long enough that you can emboss with them. For my tag I embossed the leaves with clear embossing powder. Then for some added detail I stamped the stampin up script background stamp with archival ink over the entire tag.

Finally, let's make some shimmer mist with re-inkers, water and some pearl ex or radiant pearls.

Supplies needed for shimmer mist I filled a mini mister with water about 2/3rds full and then added a dropper of shabby shutters re-inker and a pea sized amount of pearl ex.

Here's what is looks like sprayed on just a plain white sheet of cardstock.

And here it is sprayed on the tag.

I hope you've enjoyed this demo. Feel free to leave a comment if you have any questions.

The stamps I used on the demo tags are available from Rubbernecker stamp company as are all of the supplies used.
Thanks so much for stopping. I hope you're all having a wonderful weekend.

Wednesday, June 11, 2008

Distress Inks Tag Tutorial Part 1

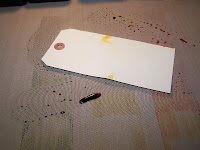
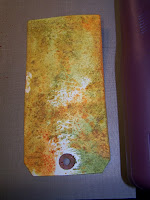
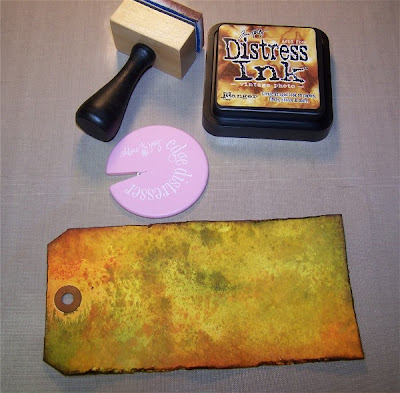
Remember the tags I made at the Stamp Expo in St Paul? I promised a tutorial on how to make them and have decided to do it in segments. Today I will show you how to ink up that plain old shipping tag to create a nice base of color.

Please note that you can click on the photos in the tutorial to enlarge them.

Let's start with a list of supplies needed:
Craft sheet (available here)
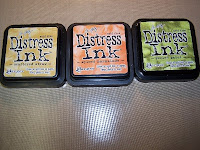
Tim Holtz Distress Ink pads (available here)
Colors used: scattered straw, spiced marmalade, peeled paint,
mustard seed and vintage photo
Mini Mister filled with water (available here)
Ink Blending Tool (available here)
Edge Distresser (Tonic one available here) *I used the Heidi Swapp one that I already had
All of the above supplies are available at Rubbernecker Stamp Company.

Step 1 - Select inks
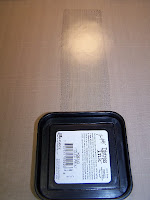
We're going to start by laying some ink on the craft sheet. To do this just take the scattered straw, spiced marmalade and peeled paint ink pads and run them in a strip directly onto the craft sheet.

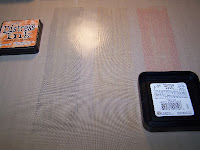
Step 2 - Drag ink pad on craft sheet


Step 3 - Continue dragging all three colors onto the craft sheet.


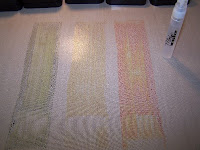
Step 4 - Once you have your three strips of color, use the mini mister to mist the inks on the craft sheet. Look how the colors just come alive when misted with water.

Step 5 - Pull out your tag and get ready for some inky fingers. Were going to drag our tag through the ink. I like to hold it at an angle and just pull it around on the sheet through the ink so I'm just inking up the lower portion of the tag and then turn it around and pull the other side though.

You can pull your tag through the ink as much or as little as you like. As long as the ink is wet on the tag it will move around so I recommend that you dry it with your heat tool after each drag through the ink so the colors set.

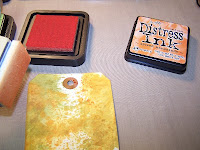
Once you like the results, wipe off your craft sheet so you have a clean work surface and pull out your ink pads and blending tool.

Step 6 - Filling in any voids and adding some depth to the colors

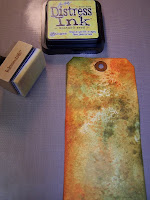
For this next step I like to take out my ink pads in the same colors I used on the craft sheet and my blending tool and fill in any areas that didn't get inked during the first part of the process. I also like to add more color to the edges of the tag to give it some depth. Please note that a different sponge should be used on the blending tool handle for each of the color families.

Step 7 - Tag before adding the layer of mustard seed.
Step 8 - Tag after adding mustard seed

With these great fall colors I like to cover the entire tag with a nice layer of mustard seed to really brighten up the colors. I love the nice warm glow it gives the tag.

Finally, I use my distress tool to distress some of the edges and then pull out the vintage photo distress ink and blending tool and add a little more color to the edges of the tag.

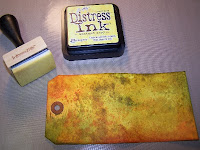
Here's the finished product.
Did you know that you can emboss with distress inks? For the next installment I will show you how to create your own ink pad with distress inks, heat embossing with distress inks, and creating your own shimmer mist with re-inkers and radiant pearls. I hope you'll stop back!

Tuesday, June 10, 2008

What a week

Last week was rather busy with commencement ceremony's, grad party preparations and work deadlines.

My nephew graduated from High School this year and his commencement ceremony was last Tuesday evening.


My niece (his cousin) also graduated from High School this year and her commencement ceremony was on Wednesday evening. We were lucky enough to be able to attend both ceremony's. Unfortunately I didn't get a photo of either one of them in full cap and gown. Eric couldn't get his gown off fast enough and Ashley felt the same about her cap. Oh well. I had a Thursday deadline for a big project at work and then took Friday off to bake for my nephews grad party on Saturday. It was a great week but didn't leave any time for stamping or blogging.

Here's the graduation card I made for my nephew.
As always, thanks for stopping by. I hope you're all safe during this crazy weather that has been happening around the country.

Tuesday, June 3, 2008

Another Late Challenge Card


Here's my card for the Paper Piecing challenge (RBC11). I know it's too late for the drawing but I still wanted to share the card. I started by stamping the heart topiary from Rubbernecker in Palette hybrid black on some My Mind's Eye designer paper then cut out a circle including most of the image on the circle. Then I stamped the image again on a variety of papers for the paper piecing. For the roses part I stamped it with colorbox white pigment ink and embossed it. Next I used my nesties to make the pink scalloped circle. I set those aside and cut out the mat from core'dinations paper and did a little sanding of the piece to bring out the different core color (I know it's hard to see in the photo). Next I added the strip of My Mind's Eye to the mat and ran it through the sewing machine. Then I added the Celebrate rub-on and sponged a little ink around it to make it stand out better, adhered the scalloped circle and the heart topiary circle. Finally I added the half circle, large brad and ribbon to the top left corner.
I hope you're all having a wonderful day. It's quite chilly here today (46 right now) but the flowering crabs are starting to bloom and look so lovely that it's hard to be upset about the cold. As always, thanks for stopping by!